
How Do I Create a Video Exhibit?
For most people, we don’t often think of the process behind making a video exhibit. We just walk into Museums of other attractions, see a screen, push a button and watch the video. Easy right? What if you were suddenly tasked with creating an exhibit of your own, would you know how to create a video exhibit? If the answer is no, this post aims to show you how…
How do I create a Video Exhibit?
It may seem like a bit of a mystery but in reality, it’s actually quite simple. All video exhibits are created using the same 4 hardware components.
Each of the examples pictured have the same core elements in common. They use all of or a combination of;
- A Player
- A Trigger
- A Video Output
- An Audio Output
These 4 things are behind almost every video exhibit you’ve ever seen…
1. Player
The Video Player is where all your content is stored. This is essential when creating a video exhibit. The Player you need will depend on how you intend to play content. You may want to set content to play on a loop, in a random order or to be activated via a triggering device such as buttons.
At blackbox-av we have developed our own range of solid state video players, the VideoClip. The VideoClip plays video from an SD card, is easily programmed and can be activated (triggered) in various ways depending on the model. You’ll find the VideoClip in installations all over the world.
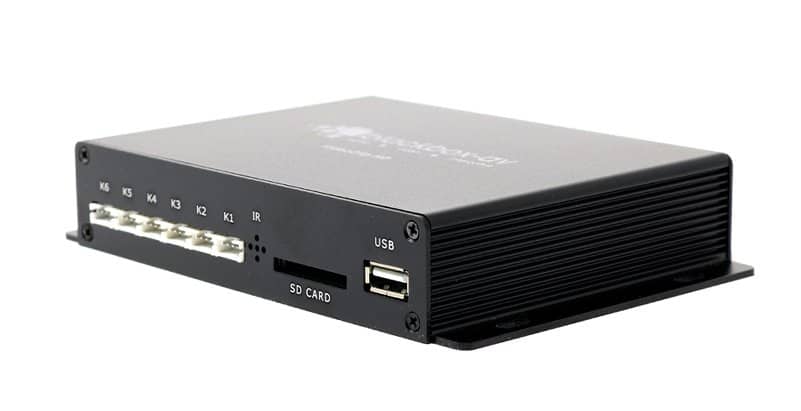
Pictured is the VideoClip HD6. This can be programmed to either loop content, activate content via up to 6 button inputs (in different ways, such as single track per button, next/previous mode to move through multiple tracks and so on). We also offer an 8 button input VideoClip, as well as a model that supports 4K video…
2. Trigger
This is essentially how your video is activated. If you have a purely looping exhibit then you won’t require a trigger. However if you have an exhibit that you want to be activated via human interaction, then you have a few options.
Buttons are always a great choice – pressing a button to activate content is something everybody understands, you can also use multiple buttons to allow visitors choice of what they want to see. There are however more unique options available, for example a pressure pad that when stepped on can act as a ‘trigger’ and start a video file, or a PIR sensor which detects human movement and triggers a video.
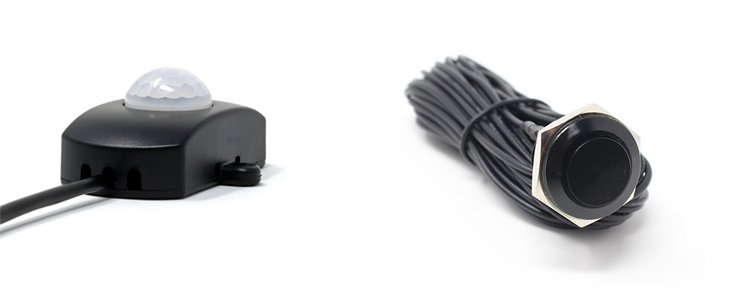
All triggers essentially work the same way, they send a message to the Video Player that it’s time to start playing content, it’s just the way this message is sent that changes depending upon your chosen trigger. Pictured is our small PIR and a standard black 16mm push button, however we have plenty more options available on our store, all of which are compatible with our range of VideoClip Players.
3. Video Output
This is what people watch your videos on. Usually a High Definition display but can also include Projectors or other unique items (for example we have re-purposed old CRT TV’s for bespoke projects before).
We have a range of screens on our store which includes Open-Frame screens (ideal for building into bespoke units) and MediaScreens which include video players built in and are ready to mount and go (ideal for displaying looping content on a wall unit).

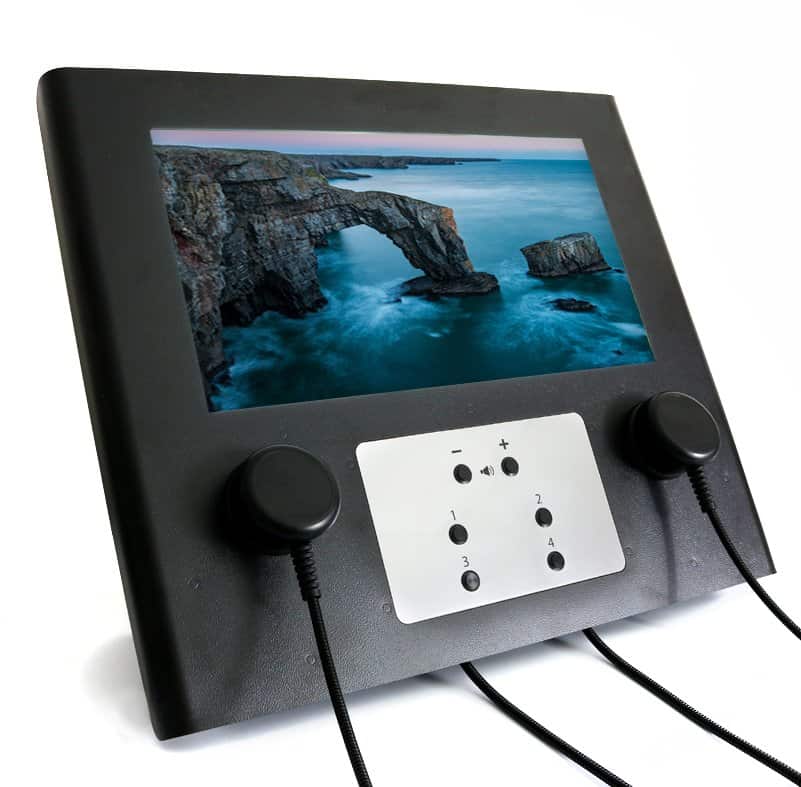
Pictured is the 22″ Open-Frame video screen which actually has an inbuilt media player (so it’s 1 and 3 combined!) it also supports up to 12 button inputs. The open-frame design allows you to easily install it into bespoke builds.
You can view our full range of screens on our store, although we don’t list standard screens and projectors, we’re also able to supply them should you require.
4. Audio Output
If your video has audio (not always the case) this is how visitors listen to it. Videos are usually a group activity so the output of choice is often speakers. However some exhibits are smaller scale and designed for just one or two people at a time, in which case headphones can be used – headphones are always a good option if you want to avoid audio bleed as well in smaller exhibitions or even larger ones with plenty of interactive media.
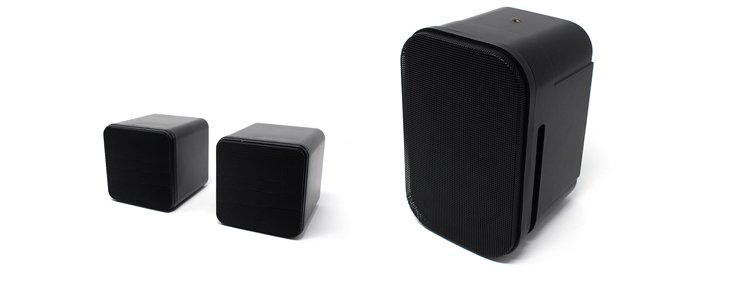
We have a range of speakers, from atmospheric loudspeakers to smaller speakers ready to be built into units on our store.
We also have a range of headphones which includes our AutoPlay range capable of triggering content upon pick-up from their magnetic hangers. You’ll be able to find our headphones in installations all over the world. We supply our headphones and handsets with a 8mm thick stainless steel armoured cable, to protect the internal audio cable.
That’s pretty much it!
Then you just need to build these 4 items into housing of some kind, be it within a wall, a desk, a free standing unit or something more unique like the recreation of a control panel pictured here. This Video Exhibit is made up of…
- VideoClip-HD8 (x2)
- Amusement buttons (x16)
- Standard 22″ Screens (x2)
- Through Panel Speakers (x2)
But by building it into an interpretive unit designed to look like a control room, it becomes a much more engaging and educational piece.
The core elements stay the same…
…but the results can be very different, depending how you put them together. This example uses pretty much the same things;
- A VideoClip-HD8
- Autoplay Headphones
- 22″ Standard Screen
But by building it into a full sized graphic and using a speaker instead of headphones, the effect is very different and allows multiple visitors to enjoy the audio interpretation together.
Get Creative…
When you understand how the elements come together, you can get creative like in this visitor centre for the Cornwall Energy Recovery plant, where the following;
- VideoClip-HD8 (x10)
- Push Buttons (x60)
- 15″ Screens masked to square format (x10)
- No Audio
Were used to create a unique quiz exhibit, where each screen displays a question in the ‘Who want’s to be a millionaire’ style. When answered correctly each screen displays a letter to finish the sentence ‘Reduce, Reuse, Recycle’
All-in-One Open Frame Solutions
As mentioned already, an even easier way to create a video exhibit is to use an all-in-one solution. These are screens which include media players, speakers and button connections in a single unit.
We’ve developed these specifically for easy installation into bespoke units. With the Open-Frame design they can be easily installed behind panels whilst the inbuilt media player makes installation even more straightforward.

Pictured is the 15″ version however the range also offers a 10″ and 22″ screen. Each with inbuilt media players and an open-frame design.
As used by…
The Open-Frame Screens were put to great use here in the New Lanark visitor centre.
Utilising;
The screens were built into various colourful bespoke units, bringing video to one of the sites temporary exhibitions. With content easily changed via USB or SD Card – the screens can be used again for future exhibitions as well.
Improve on Traditional Signage…
To create far more engaging content than would have been the case without them. If you want to learn more about improving your traditional signage click here.
Or as a quiz…
We used the an Open-Frame screen built into a signage panel to create a simple multiple choice quiz for the Bryn Pica Recycling Visitor Centre.
Utilising;
The panel displays a number of questions, while the screens offer 3 possible options. When the corresponding button is pressed the correct answer is displayed.
Sign up…
Sign up to our Newsletter below to receive news and exclusive insights.
The only limitation is your imagination
As you can tell from above, the same 4 elements – Player / Trigger / Video Output / Audio Output when combined in various ways and built into unique housings, can create very different results. The limitation really is your imagination.
All-In-One Solutions
If you’re not able to build the required elements into a custom housing, or want something simpler to integrate with your exhibit, you can utilise a range of all-in-one solutions we offer off-the-shelf. These include a range of Video units that can be mounted to the wall, desk or even free standing.

10″ Free Standing AV Point – Traditional
With a traditional wooden style, the 10″ Free-Standing AV Point is a great solution for classic heritage sites. The AV point offers 10 easily programmed buttons for activating content and 2 dedicated for volume control.
The button selection is presented on the looping holding screen via a video or an image, all easily changed when required via USB – allowing the AV point to be quickly used for new content.
22″ Desktop Mounted AV Point Modern
The modern AV Point range offers the same functionality as the traditional however is presented in a rugged yet sleek steel enclosure. This is the desk mounted version which can be securely fitted to a table surface.
As with the Traditional version the button selection is presented on the looping holding screen via a video or an image, all easily changed when required via USB – allowing the AV point to be quickly used for new content.
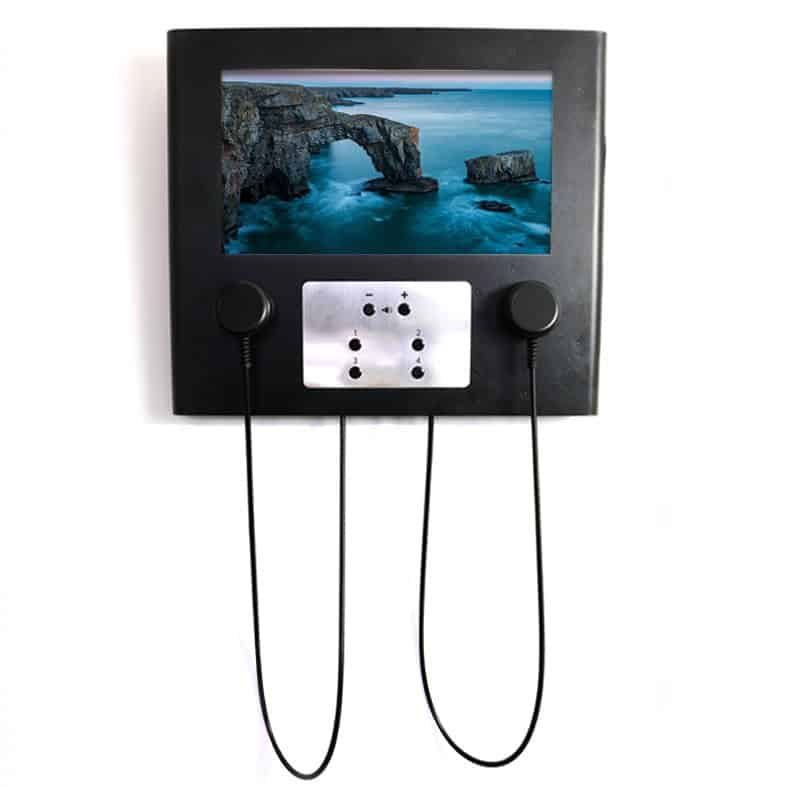
22″ Wall Mounted AV Point Modern
This is the wall mounted version of the Modern AV point, in the same rugged yet sleek steel enclosure as the desk mounted version, but designed to be fitted to a wall.
Again the button selection is presented on the looping holding screen via a video or an image, all easily changed when required via USB – allowing the AV point to be quickly used for new content.

Mediascreen 4K 43|55″
The MediaScreen 4K is a simple to use video screen that will loop a video on power up thanks to the built in 4K media player. Content is easily transferred via a USB stick and then stored on the internal HDD.
The MediaScreen 4K boasts a commercial quality IPS screen with 178 degree viewing angle. A 32″ version in HD is also available.
Some of our work…
Here you can see some projects we’ve worked on that have used various video techniques to bring their visitor attractions to life…
Hopefully this post has been enlightening, if you have any questions at all about how to create a Video Exhibit (or anything else for that matter!) please get in touch using the form below.
Or leave a comment at the bottom of the page…
We have a video display that plays three, 30-minute videos in our museum. Do you have any recommendation as to how, when a visitor enters our theater, that they can choose which one of the three videos to watch? Then, when the video gets done playing, we want the playing to remain stopped until another choice is made via some type of switch to start the next selection. Currently all three videos play in a loop and we want to make the choice as to which one to watch up the the visitor by them selecting a switch, which will then play the entire 30-minute video that was selected.
Could you advise us if you have a product that will fill our needs or what your suggestions would be. Thank you.
Hi Dean, apologies for the short delay in getting back to you. This is certainly something we can help with. We’d suggest a VideoClip HD8 and a PIR Sensor/Push Button – This will allow users to activate your video content separately.
We’ll have somebody get in touch to discuss your requirements shortly, have a great day!